
สวัสดีครับท่านผู้อ่าน
จากตอนที่แล้วที่บอกว่าจะมาพูดถึงการทำงานของระบบ
เผอิญว่าสัปดาห์นี้ CPE111 มีสอนทำ mini web server และควบคุมสัญญาณไฟฟ้าด้วย Arduino ก็เลยจะมาพูดถึงเรื่องนี้กันนะครับ
โครงงานของเรา ส่วนประกอบ (และฟีเจอร์) หนึ่งที่สำคัญคือการรับคำสั่งผ่านระบบ internet ทำให้ต้องใช้ Web server เข้ามาเพื่อรับค่าจากผู้ใช้ผ่าน Web app หรืออื่นๆ แล้วสั่งการจากบอร์ดไปยังเครื่องใช้ไฟฟ้าครับ
/*
  Web Server
 http://arduino.cc/en/Reference/Ethernet
 http://arduino.cc/en/Tutorial/WebServer
 http://startingelectronics.com/tutorials/arduino/ethernet-shield-web-server-tutorial/basic-web-server/

 A simple web server that shows the value of the analog input pins.
 using an Arduino Wiznet Ethernet shield.

 Circuit:
 * Ethernet shield attached to pins 10, 11, 12, 13
 * Analog inputs attached to pins A0 through A5 (optional)

 created 18 Dec 2009
 by David A. Mellis
 modified 9 Apr 2012
 by Tom Igoe
 modified 17 Apr 2014
 by Masterpeice

 */

#include <SPI.h>
#include <Ethernet.h>

int SDcard = 4, led=13; /* Pin for SD card to disable */
// Enter a MAC address and IP address for your controller below.
// The IP address will be dependent on your local network:
byte mac[] = {0xDE, 0xAD, 0xBE, 0xE1, 0x06, 0x02 };
// IPAddress ip(10,35,21,177);
IPAddress ip(10,35,21,112);

// Initialize the Ethernet server library
// with the IP address and port you want to use
// (port 80 is default for HTTP):
EthernetServer server(80);

// the setup routine runs once when you press reset:
void setup() {

  Serial.begin(9600);
  Serial.println("Log: Setup is starting... ");

  // disable the SD card by switching pin 4 high
  // not using the SD card in this program, but if an SD card is left in the socket,
  // it may cause a problem with accessing the Ethernet chip, unless disabled
  pinMode(SDcard, OUTPUT);

  // initialize the digital pin as an output.
  pinMode(led, OUTPUT);
  Serial.println("Log: SDcard is disabling... ");

  // start the Ethernet connection and the server:
  if(Ethernet.begin(mac) == 0) {
    Serial.println("Log: Cannot obtain IP address. Use a fixed one");
    Ethernet.begin(mac, ip);
  }else{
    Serial.println("Log: Waiting for CPE111's missing TA...");
  }

  server.begin();
  Serial.println("Log: Server is at ");
  Serial.println(Ethernet.localIP());

}

// the loop routine runs over and over again forever:
void loop() {
  // listen for incoming clients
  EthernetClient client = server.available();
  if (client) {
    Serial.println("Log: New client connected...");
    Serial.println("Log: Messages from client: ");

    // an http request ends with a blank line
    boolean currentLineIsBlank = true;
    while (client.connected()) {
      if (client.available()) {
        char c = client.read();
        Serial.write(c);

        // if you've gotten to the end of the line (received a newline
        // character) and the line is blank, the http request has ended,
        // so you can send a reply
        if (c == '\n' && currentLineIsBlank) {

            String MSG = "";  /* To get message from client */
            while(client.available()) {
              c = client.read();
              MSG += c;       /* Read data from client */
            }

            // Display what has been received from the client
            Serial.println("Log: Body message: ");
            Serial.println(MSG);

            // Standard http response header
            client.println("HTTP/1.1 200 OK");
            client.println("Content-Type: text/html");
            client.println("Connection: close");  // the connection will be closed after completion of the response
            client.println();                     // Add another CR/LF pair to indicate the end of header

            // HTTP message body (to be rendered by a Web browser)
            client.println("<!DOCTYPE HTML>");
            client.println("<html>");

            if(MSG != "") {
              client.print("You send me ");
              client.print(MSG);
              if(MSG=="ledon=1"){
                client.print("<h1>Yeah! ;)</h1>");
                digitalWrite(led, HIGH);   // turn the LED on (HIGH is the voltage level)
                delay(1000);
              }else{
                client.print("<h1>Yo! ;)</h1>");
                digitalWrite(led, LOW);    // turn the LED off by making the voltage LOW
                delay(1000);
              }
              client.println("</br>");
            }
            else{
              client.println("You send me nothing");
              digitalWrite(led, LOW);    // turn the LED off by making the voltage LOW
              delay(1000);
            }

            client.print("<form method=\"post\">");
            client.print("<input onclick=\"this.form.submit()\" type=\"radio\" name=\"ledon\" value=\"1\"/> On<br />");
            client.print("<input onclick=\"this.form.submit()\" type=\"radio\" name=\"ledon\" value=\"0\"/> Off <br/>");
            client.print("</form>");

            client.println("</html>"); /* End of html page */
            break;
        }

        // every line of text received from the client ends with \r\n
        if (c == '\n') {
          // you're starting a new line
          currentLineIsBlank = true;
        }
        else if (c != '\r') {
          // you've gotten a character on the current line
          currentLineIsBlank = false;
        }
        /* Continue reading more characters ... */

      }
    }

    // give the web browser time to receive the data
    delay(1);

    // close the connection:
    client.stop();
    Serial.println("Log: client disconnected");
  }
  else{
    //no bdy connect
    //Serial.println("Log: ;________;");
  }
}
จาก Code ด้านบน เป็นระบบควบคุมไฟสัญญานบนบอร์ดให้เห็นเป็นตัวอย่างครับ หลักการก็ไม่มีอะไรมากครับ แค่ใช้การ loop รอว่าจะมีคำสั่งจาก user ผ่าน ip ที่ได้รับมาจาก switch เมื่อไหร่ (โดยดู ip จาก serial monitor) รับค่าจากฟอร์มแล้วควบคุมสัญญาณไฟหากผู้ใช้ส่งค่ามา แล้วพ่น web page ขึ้นมาไว้รับค่าจากผู้ใช้เพื่อสั่งงานอีกครั้งครับ

ตัวอย่างการแสดงข้อมูลจาก Serial monitor (จากคู่ของอิงกับเอลฟ์)
ตอนทำในส่วนของ Code ไม่ค่อยมีปัญหาครับ เพราะ Code มาแทบจะพร้อมใช้อยู่แล้ว แค่ปรับปรุงให้ใช้งานได้ตามวัตถุประสงค์ของงานเราโดยการเพิ่มการตรวจค่า (ผมไม่แน่ใจว่า Arduino มีฟังก์ชันสกัดค่าออกมามั้ย เลยใช้การเทียบค่าไปตรงๆ แทนครับ) แล้วสั่งการ LED ครับ แต่ปัญหาจะไปตกกับ Hardware มากกว่า อาจจะเพราะว่าใช้สอนมามาก หรือเคยถูกใช้งานอย่างไม่ถูกต้อง การอัพโหลด Code ของคู่บิ๊กกับกบเลยมีปัญหาเกือบจะไม่รอด ประกอบกับไฟ LED ที่กล่าวไปก็ไม่ทำตามคำสั่งด้วย โชคยังดีที่อิงมาแก้ปัญหาให้จนผ่าน (คือกลุ่มผมมี 4 คน แต่มีบอร์ด 2 บอร์ด เลยแบ่งกันทำโดยแบ่งเป็นบิ๊กคู่กับกบ และอิงคู่กับเอลฟ์ ใครทำเสร็จก่อนก็เอาตัวนั้นไปเขียนรายงานส่ง)

ตัวอย่างการทำงานที่ได้จาก Web server (จากหน้าจอของอิงกับเอลฟ์)
หลังจากจบ Lab ไป ก็ได้ข่าวดีจากพี่โทนี่ TA ประจำกลุ่มว่า Rasberry Pi ที่สั่ง เอ้ย! ที่ขอไว้ได้แล้ว ให้ไปเอาที่ iNeng ครับ
ของที่ได้ นอกจาก Rasberry Pi แล้ว ยังมี SD card ซึ่งเมื่อคืนอิงลง Linux RASPBIAN ไว้สำหรับการควบคุมระบบ และกล่องสำหรับบรรจุระบบพร้อมรางปลั๊กไฟเพื่อควบคุมระบบไว้ โดยควบคุมด้วย terminal ผ่านระบบ LAN ซึ่งกินไฟและทรัพยากรน้อยกว่าการเอาคีย์บอร์ด เมาส์และหน้าจอไปต่อให้เยอะครับ

รายงานการลงระบบ OS ในเครื่อง Raspberry Pi
ตอนนี้เรากำลังทดสอบดูครับว่าจะสามารถรันระบบได้จริงๆ มั้ย โดยการลองยิง ping เข้าบอร์ดทิ้งไว้ 1 คืน แล้วมาดูผลอีกทีครับว่าจะหมู่ จ่า แห้ว หรือไหม้!
ล่าสุด หลังจากที่ถล่มยิงไป 1 ชั่วโมง ก็พบว่าเครื่องร้อนสูงถึง 53°C ไปแล้วครับ แต่ก็ยังทำงานได้ตามปกติ

หน้าจอ terminal แสดงผลอุณหภูมิของ Raspberry Pi หลังจากระดมยิง ping ผ่านไป 1 ชม.
แต่อิงก็ยังทรมาน เอ้ย! ทดสอบเครื่องต่อโดยการเรียกหน้าเว็บขึ้นมาโดยไม่เก็บแคชไว้ในระบบ คงต้องรอดูกันครับว่าจะรอดหรือจะไหม้ =_=’
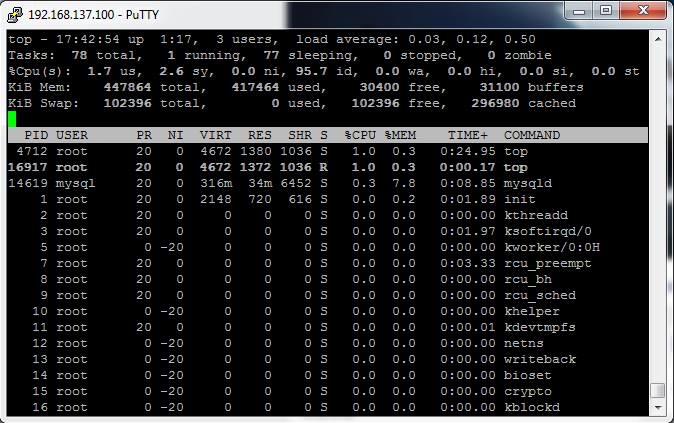
หน้าจอ terminal แสดงภาระการทำงานภายในระบบของ Rasberry Pi
หลังจากทดลองไปชั่วโมงครึ่ง…